- Introduction
- Setup
- Customers
- Inventory
- Employees
- Vendors
- Sales
- Purchasing
- Accounting
- Maintenance
- Reports
- Utilities
Page last updated: August 21, 2012
All rights reserved.
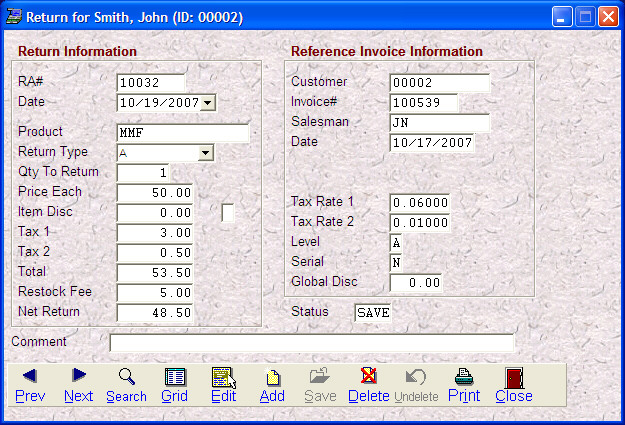
Customer RMAsUse customer RMAs when returns are a two-step process for your company, i.e., the customer calls and says they need to return something; you issue an RMA number and then the customer ships the goods back to you when you then final process the RMA.
To access Customer RMAs,
select Sales You will then see the Return Authorization screen.
Step 1 - Creating an RMA Select Add from the toolbar. A grid will appear of the customer's processed invoices. Select the item being returned. The quantity, price each and total price will default to what was on the invoice, however, you may change these if necessary. You then need to select the return type: Cash, Check, Credit Card, Store Credit, or Exchange. A drop down selection list is available. If you are charging a restocking fee, enter in the dollar amount as the total restocking fee for the item. This is not an each price, but a total for whatever quantity is being returned. You may enter an optional comment, which could be the reason for the return. Select Save when done. To print out the RMA, select Print. You will be asked if you want a Return Authorization or Credit Memo. The only difference in the information printed is the title of the document. Step 2 - Processing an RMA When the merchandise comes back, you will need to process the RMA. Locate the RMA and press [F2]. You will be asked if the items should be added back into inventory. The default answer is Y (for yes); simply press [Enter] to accept this and complete process on the RA. If the item is damaged and will not be put back into stock to resell, then answer N (for no.) If the item is serialized, you will receive an additional prompt asking you to enter the serial number being returned. Even if you are not putting the item back into stock, you should enter the serial number. If the item is returned to stock, the serial number will again be available for selling. If the item is not returned to stock, the serial number will be updated to indicate that it was returned by the customer and should be returned to the vendor. If the return type was check, you will then be prompted to enter the check information. Once entered, the check will be in the check register where it can be printed along with any other checks. |